Final piece presented in Chatham House

This is how I plan on exhibiting my final piece. There are different layers of my work, which are separated using 10mm thick perspex to create a 3D effect. They will be presented on light-boxes which I made herself. There are three light-boxes all together displaying my work. I also plan to turn the part above the fireplace into a shrine by placing candles on there. Below is a sketch-up and images to show you what my work will look like.


Making the Lightbox

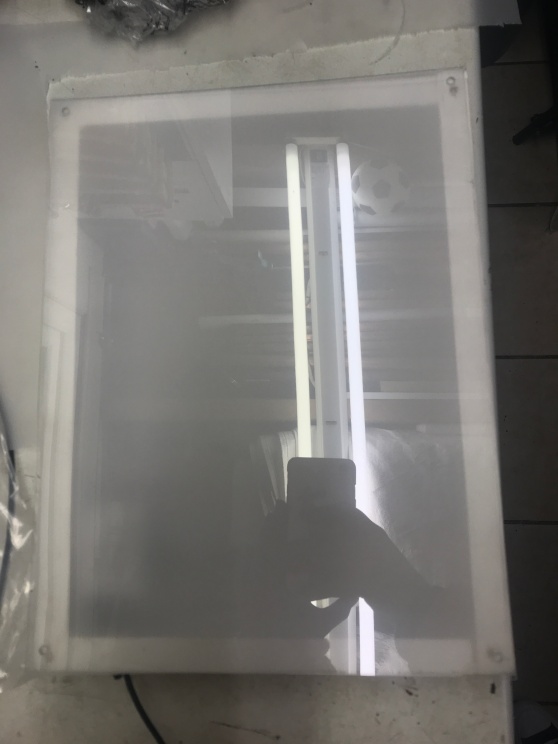
On this page are pictures of the process of making my light-boxes for presenting my work. I  started making them by cutting a piece of MDF to an A4 size, I then got a thicker piece of wood and cut that to fit around the A4 bit of MDF, I then secured this together using screws and silicone to make sure it was appropriately secure. I then repeated this step, so I had three outer parts to my light-boxes. Once I completed this stage, I sanded them down and painted them white. I chose to paint them white as reflects light which will make my light-boxes seem brighter. When they were all dry, I then placed led strips to them and drilled two small holes and the bottom of the cable and the sensor for the remote. Once I made sure all the lights were working correctly, I then placed the defuser for the lightbox on top. I made the defuser with tracing paper and frosted polypropylene which I bought from the shop at UCA. I then cut them down to the size I needed. I later purchased some 1mm thick perspex and cut that down to the size I needed. I then placed the tracing paper and frosted polypropylene underneath the perspex and secured this all to the box. We first tried supergluing it down, but that looked messy, so we took it of sanded all down again and painted it then secured them with four little screws in each corner. This suddenly looked so much better. The light-box was then made, and all was left to do was place my images on top of it. To do this, I got a 10mm thick perspex and with superglue stuck my acetate images to either side of it. I then secured them to the light box with superglue just applying it to the corners.

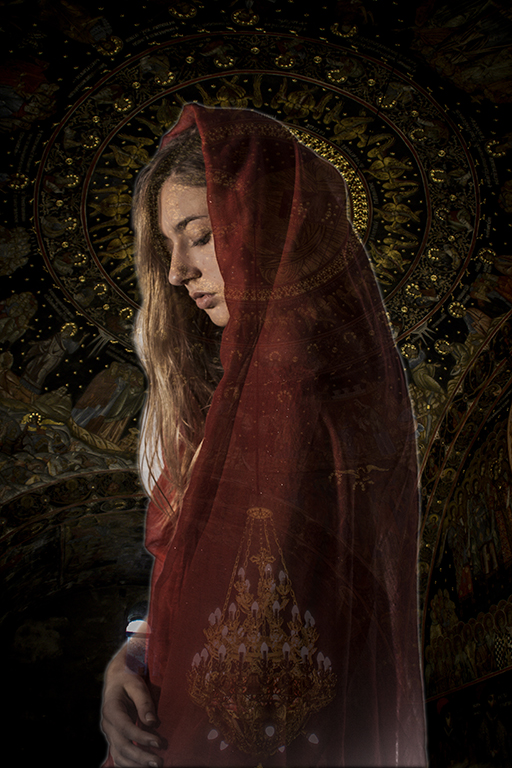
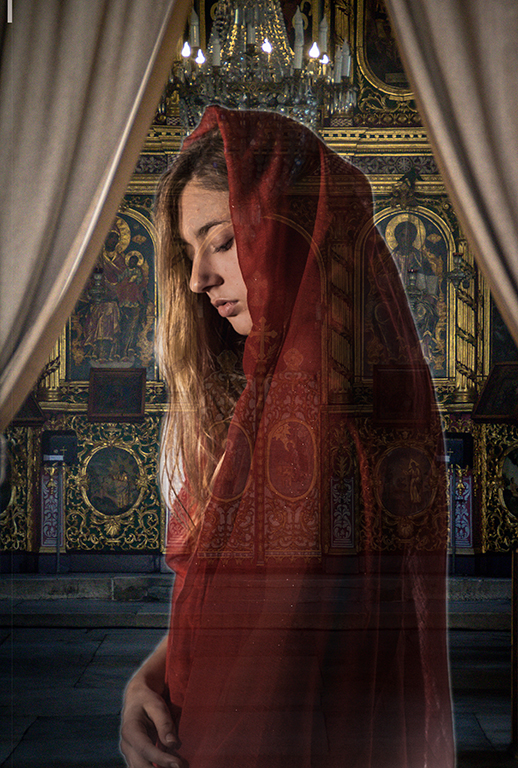
I have a remote that controls the LED lights which lets me also change the colour of them. As you can see from the images below, I have also experimented with the different colours of the LED lights against my pictures. I don’t know what colour I want the lights until they are hanging up in the space.

I am thrilled with how they light-boxes have turned out, and my images look amazing on them. I can’t wait to put them up for the exhibition in January.


Cyanotype Workshop

Today we had a cyanotype workshop. I had worked with cyanotype before at my previous school, so it was fun to do this technique again.  Below are some images from the workshop. As you can see, i tried this three times each time changing the amount of time it was under the UV light or with different paper. As you can tell from the photos, the first one turned out the strongest

As an experiment, i thought I would try to see what my acetate images would look like layered onto of the cyanotype. They look good however the colours of the photos are boring compared to the pictures I intended to use. The images look dull and do not attract the viewer at all. It’s a good idea to keep in my mind for future units.


Combing Images With New Images

Here I combined the images with the halo with the Bulgaria images. As you can see from the photos below, I have experimented with different backgrounds and model for each picture. Some are stronger than the others, and some don’t work at all. But I’m happy with how they look. I hope they will look even better separated physically.

Combing first edits with Halo

Here I have photoshopped the halo onto the first set of images I did. These photos look so much better, and I am thrilled with how they look now. The halo works well photoshopped in. I look forward to seeing them against the background images.

Second Edits

This is the second lots of edits I have done from the shoots that I did with the halo. The images don’t look too bad. However, I’m still not 100% sure about them I still think the halo seems odd. I believe this is because it doesn’t go round the models whole head. I took a picture of the halo separately. I plan to photoshop the halo on to the first set of edited images I did and see if it looks better then.

holly shoot 2 25th0137

Test Shoot 7

For this shoot, I have done the same as shoot six. However, this time changing the clothing. This shoot is better than the previous one. However, I still don’t think it looks right..

Test Shoot 6 – With Crown

For this shoot, I have done the same as my first shoot but this time experiment with adding a halo to the shoot. As you can see I have experimented with it in deferent ways with the silver dress, I did this by placing the halo on its own with the dress, then with some flower. Then with the red headscarf and then finally with the halo, Flowers and head scarf altogether. I also experiment with the different lighting as I did in the last two shoots. I don’t like how this shoot went. The objects I placed in the shoot didn’t go together as well as I thought they would. Something doesn’t look right. In my next shoot, I will maybe try with different clothing.

Combing Images

Here I have combined the images from the studio with the pictures from Bulgaria. I like how these look. And think they will look more efficient once separated physically and presented on a lightbox. The images work well together and compliment each other effectively. The colours are bright and eye-catching witch I want.

Edits so far

The images you see on this page are some edits I have done with the photos I have taken so far. I am really pleased with how these have turned out and think they will look effective against the busy backgrounds I plan to place behind them. I think the colours I have chosen will look really well against the gold that is in the other photos.

Test shoot 5

For this shoot, I used the same lighting that I used in shoot four, however, this time I changed the clothing to the flower patterned playsuit with the chest cut out, as you can see I paired this with the red headscarf. I like the colours of this shoot. They are really bright and work well together. The red headscarf makes red flowers in the playsuit really stand out. I’m pleased with how this shoot has turned out.

Test Shoot 4

For this shoot, I used the red dress with the red headscarf, but this time I experimented with different lighting. I did this by only using one light instead of two. For this, I just removed the light that had the softbox on it and used the side lightly with the defuser. I like how these images have turned out. However, some of them are a bit too dark on the face. This could maybe be brightened up in Photoshop/Lightroom.

Test Shoot 3

For this third shoot, I have again used the same lighting. However, this time experimented with different clothing. For this, I combined the clothing from the first shoot by choosing an outfit that had a flower print on it. I then connected it with the second shoot by making it sexy by having the front of the top cut away, so her chest was showing making it modern and sexy still. I like this choice of clothing think it works well with the headscarf. I experimented again with the blue and red headscarf and concluded the red one was the best in this shoot. Some of these images are strong. However, for my next shoot, I will experiment with different lighting, maybe making it darker, perhaps having some shadows across the face.


Test Shoot 2

This is the second shoot I have done, as you can tell I have used the same lighting but this time I have experimented with different clothes. I have this time put the model in an off-the-shoulder red dress. I chose this as I wanted the model to look more modern and sexy compared the clothing on the original icon paintings. I first placed the dress with a red scarf with gold detail in it. Even though there is a lot of red in these images, I think this works well together, especially when it will have the busy background behind it. I then tested it with a blue scarf. However, I didn’t like how this went together.

I still think I need to experiment with different clothing so this time I will try something combining this shoot and the first soot.

Test shoot 1

This is the first test shoot I did in the studio. For this shoot, I used the Canon 5D with a white backdrop as I’m planning to crop it out anyway. I used two spotlights one with a softbox and one with a defuser in front of it. There are two images at the bottom of this page to show how I set the studio up.

I decided to put the model in a silver shiny flower print dress. For the first couple of shots, I chose to pair it with a red scarf on the head. I then experiment using a blue scarf. As you can see from my images, I also experimented in different ways in which I placed the headscarf. I wanted the model to be wearing minimal makeup, but her lips to look shiny, so for this I used Vaseline. I also slightly wet the hair, so it came out more detailed in the photos. For the first shoot, I think this went quite efficiently. However, I’m not too sure on the dress with he headscarf so for my next shoot I plan to try different clothing. Out of the red and the blue scarf, I think the red one looks the most effective.


Bachkovo Monastery

Bachkovo Monastery (“Assumption of the Holy Mother”) is my favorite Monastery I went to in Bulgaria. The artwork in there was incredible, covered head to toe in icons and gold, and you can see this from my images below.  Bachkovo monastery is the second largest monastery in Bulgaria. The famous Bulgarian icon painter Zahariy Zograf (1810-1853), executed the images in the church’s interior from 1838-1840. In the cathedral, there is an icon from 1311 known as The Holy Mother of God Icon, with a silver repousse cover. This figure is believed to have miraculous powers, and It attracts many visitors. People can queue and go to pray, share their worries; ask for protection and well-being in life.

Asen’s Fortress

These images you see are of the church built next to the Asen’s fortress. Asen’s fortress has existed since the times of the Thracians /3rd millennium BC. It was enlarged and fortified in 1231 during the reign of Tsar Ivan Asen II, and it was named after him. It was conquered by the crusaders during the Third Crusade, and it was destroyed to a great extent during the fall of Bulgaria under the Turkish yoke. “The Holy Mother from Petrich” church is the sole completely preserved building and are the images you see below. The frescoes you see in my pictures go backdating to the 13th century. The church is one of the oldest in all of Eastern Orthodoxy. The church was restored as you can also see from my photos, but where the fresco paintings are so old, they couldn’t repair all of them.

Uzundzhovo Church

On this page are some images of a different Russian church in Bulgaria called Uzundzhovo church (Church of the Assumption). This was another fantastic church with so much history too it. It is a Bulgarian Orthodox church in the village of Uzundzhovo, Haskovo. It was Built as a mosque during the Ottoman era, and it was reconstructed in 1906 as a church. It has various elements of Christianity and Islam. You can see from my images that this church looks newly built, the reason why it does is that in 2007 the church was thoroughly reconstructed by the Haskovo Municipality. During the restoration works, two medieval inscriptions in Arabic on religious-philosophical topics were discovered. All the icons and frescoes were restored.

Shipka Monastery

On this page are some images I took in Shipka Monastery in Bulgaria. This Monastery was beautiful inside and out, and you can see how much effort was put into this church. Every detail was thought about carefully.  Shipka Monastery is a Bulgarian Orthodox church built near the town of Shipka. This monastery was dedicated to the Russian and Bulgarian soldiers that died for the liberation of Bulgaria in the Russo-Turkish War, 1877-78. The churches have a bell tower and are one the heaviest of which it weighs 12 tons. It was cast from the cartridges that were collected after the battles of the Russo-Turkish War. From some of my image you can see that in the temple itself, the names of the Russian regiments and Bulgarian volunteers are inscribed on 34 marble plates.